ယထာ အာေရာဂ် ၊ ေယာဗၺနံ ဗ်ာဓိ ဇရာ ပေရာသိတံ ။ ဧ၀ံ ဟိ ဇိ၀ိတံ သဗၺံ ၊ မရဏပၸရိေယာသိတံ ။

Wednesday, 26 December 2012

Deep Freeze


 အေၾကာင္းအမ်ိဳးမ်ိဳးေၾကာင့္ Deep Freeze Password ေမ့သြားရင္ပဲျဖစ္ျဖစ္ Uninstall လုပ္ခ်င္ရင္ပဲျဖစ္ျဖစ္ အဆင္ေျပေအာင္ Deep Unfreezer နဲ႔ Anti Deep Freeze 7 Software ေလးပါ
 အားလံုးအတြက္ ျပန္လည္မွ်ေဝေပးလိုက္ပါတယ္..... 
Deep Freeze Enterprise 7.51 Crack Patch Download - Deep Freeze Enterprise 7.51 Full version is system utility software. Deep Freeze Enterprise 7.51 is the only solution that effectively balances workstation security with user productivity. By mapping user and application data to a Thawed (unprotected) partition or drive, users are able to store their documents, pictures, music, etc., While still enjoying the total system consistency that Deep Freeze offers.
Deep Freeze Enterprise 7.51 offers flexible scheduling options that enable IT administrators to easily create automated update and maintenance periods. Schedule Deep Freeze to allow system and virus definition updates to occur from predefined times-either with the Deep Freeze Enterprise Console or using your preferred third-party desktop management solution.
After doing the install to the Deep Freeze 7 turned out to not pay attention to warning default password. Finally Deep Freeze locked and can't open. Maybe you've experienced such a thing. 
This application that can help you reset the password of your Deep Freeze. Previous winkabarkyaw already share the application deepdssds. Certainly the current range of Anti Deep Freeze v.0.4.Can be used to open the Deep Freeze 7. This application is very easy to use.
Download AntiDeepFreeze 7
Download DeepUnfreezer1.6
 
http://winkabarkyaw.blogspot.com 

Saturday, 8 December 2012

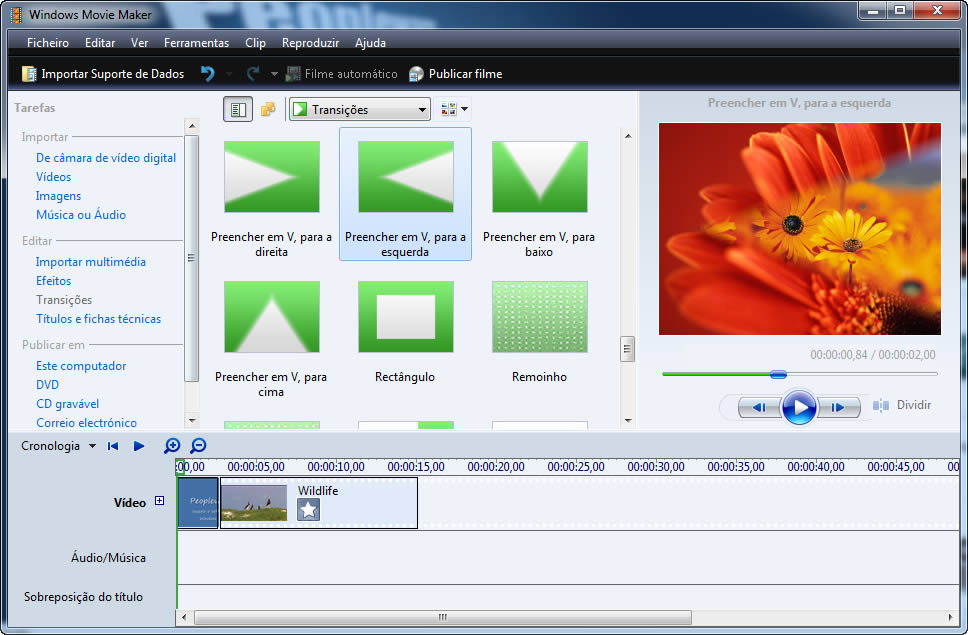
Windows Movie Maker for Windows 7 v1.0 Build 6.5

Windows Movie Maker for Windows 7 v1.0 Build 6.5| 12 MB |

ဒီေကာင္ေလးကေတာ့ slideshow ျပဳလုပ္ရာမွာ အျခားေဆာ့ဝဲလ္ေတြကို အသံုးျပဳစရာမလိုဘဲ vista / xp မ်ားမွာ Microsoft ကထည့္ေပးလိုက္တဲ့ Windows Movie Maker ကို အသံုးျပဳသလို က်ေနာ္တို ့ windows 7 သမား မ်ားအတြက္ သီးသန္ ့အသံုးျပဳနိုင္တဲ့ Windows Movie Maker software ေလးျဖစ္ ပါတယ္. အထဲမွာပါဝင္တဲ့ effect ေတြကလဲ ယေန ့နာမည္ၾကီး ေစ်းၾကီးေပးေနရတဲ့ slideshow software
မ်ား အတိုင္း အရည္အေသြးမွီ slideshow တစ္ေခြကို လွလွပပ ဖန္တီးနိုင္ပါတယ္။ အသံုးျပဳနည္းကလဲ အရမ္းလြယ္ကူ တဲ့အတြက္ windows 7 user မ်ားအေနနဲ ့မိမိတို ့စက္ထဲမွာထည့္သြင္းထားသင့္ပါတယ္. 32-bit and 64-bit ( ၂ ) မ်ိဳး စလံုးမွာ supports လုပ္ပါတယ္။

အသံုးျပဳခ်င္တဲ့မိတ္ေဆြမ်ားေအာက္မွာ download ယူနိုင္ပါတယ္...
DOWNLOAD:
{ MF - password: nayminkhit }


ေက်းဇူးတင္ပါတယ္...  ေနမင္းေခတ္

Portable ParetoLogic RegCure Pro 3.1.3.0

ParetoLogic RegCure Pro 3.1.3.0 Portable | 5.9 Mb


ဒီေကာင္ေလးကေတာ့ က်ေနာ္အရင္တုန္းက ဘေလာ့မိတ္ေဆြမ်ားကို ေဝမွ်ေပးဖူးပါတယ္. မိမိတို ့ရဲ ့ကြန္ ပ်ဴတာတိုင္း မွာ မရွိမျဖစ္လိုအပ္တဲ့ေဆာ့ဝဲလ္ေလးပါ။ ဘာအတြက္အသံုးဝင္တာလဲဆိုရင္ အဓိက အားျဖင့္ ကြန္ပ်ဴတာအတြင္းအသံုးမဝင္တဲ့ Windows registry errors ေတြကိုဖယ္ ရွားေပးျခင္း၊ ဝင္းဒိုး စတက္ တဲ့အခ်ိန္မွာ မလိုလားအပ္တဲ့ ပရိုရမ္ေတြရဲ ့ processes ေတြကို ရပ္တန္ ့ေပးျခင္း ၊ viruses, spyware and other malware ေတြကို ဖယ္ရွားေပးနိုင္ျခင္း ၊မိမိကြန္ပ်ဴတာေလးအျမဲတမ္းေပါ့ပါးေနေစဖို ့ဒုကၡေပးေလ့ ရွိတဲ့ junk files ေတြကို ရွင္းလင္းေပးနိုင္ျခင္းစတာေတြကို အသံုးျပဳနိုင္ပါတယ္။ ဒီေကာင္ေလး က portable ေလးျဖစ္တဲ့အတြက္ ဘေလာ့မိတ္ေဆြမ်ား အသံုးျပဳရတာအဆင္ေျပမယ္လို ့ေမွ်ာ္လင့္ပါတယ္။ တစ္ခုသတိေပးခ်င္တာရွိပါတယ္ . ဒီ rar ဖိုင္ထဲက .exe portable ဖိုင္ေတြကို double click နဲ ့ဖြင့္လို ့မရရင္ မည္သည့္ portable .rar ကိုမဆို extract here နဲ ့ဖိုင္ခြဲထုတ္လိုက္ျပီး (  .exe ) ေပၚမွာ right click >>> Run as administrator နဲ ့ဖြင့္ေပးၾကပါလို ့လမ္းၾကံဳလို ့ သတိေပး လိုက္ပါတယ္။ အေသးစိတ္ေလ့လာခ်င္တယ္ဆိုရင္ေအာက္မွာေလ့လာနိုင္ပါတယ္။


RegCure Pro's System Scan seeks out - and then fixes:
System Errors: The Windows registry is a complicated database that keeps track of all kinds of settings and relationships for your computer's hardware, software, users and preferences. Over time the registry can become unstable and corrupt. Cleaning it can solve many performance issues. RegCure Pro cleans ActiveX, shared DLLs, uninstall entries, file path references, shell extensions, application paths and other errors.
Malware: There are all kinds of viruses, spyware, Trojans and other malware looking to infect your machine. These can try to steal your credit card or banking information or try to take over your PC or another devious task. Many forms of malware hurt your computer's performance. RegCure Pro's malware scanner finds active malware and kicks it off your machine.
Performance Issues: At any given time, various programs and processes are running on your PC. If too many are happening or if some are very resource intensive, poor performance can occur. RegCure Pro identifies unneeded process that are just slowing your computer down.
Privacy Items: Your computer stores a vast amount of information - and sometimes that's not good! Information added to your computer through your regular Internet browsing and file use could be used for targeted phishing schemes, identity theft and similar crimes. RegCure Pro wipes away confidential information: passwords, login credentials, credit card numbers, banking data and much more.
Junk Files: Unneeded items just take up space on your PC. RegCure Pro efficiently cleans away junk files, temporary items and clutter.

အသံုးျပဳခ်င္တဲ့မိတ္ေဆြမ်ားေအာက္မွာ download ယူနိုင္ပါတယ္...
DOWNLOAD:
{ MF - password: nayminkhit }

ေက်းဇူးတင္ပါတယ္... ေနမင္းေခတ္

Windows 7 Back up and Restore ျပဳလုပ္နည္း

  ဒီေန ့ေတာ့ က်ေနာ္ေဖၚျပေပးမယ့္နည္းလမ္းေလးကေတာ့ အကိုတစ္ေယာက္စီေဘာက္မွာ ေမးထားလို ့ တျခား မိတ္ေဆြမ်ားလဲ ေလ့လာလို ့ရေအာင္ တင္ေပးရျခင္းျဖစ္ပါတယ္. Back up and restore ျပဳလုပ္ျခင္းအေၾကာင္းေလးျဖစ္ပါတယ္.ဒီေခါင္းစဥ္က ဟိုးေရွးေရွးတုန္းက က်ေနာ္တို ့ျမန္မာလူမ်ိဳး ဆရာ့၊ဆရာၾကီးေတြ အေတာ္မ်ားမ်ား ေရာ၊ အျခားလူမ်ိဳးေတြေရာဘာသာစကားေပါင္းစံုနဲ ့အြန္လိုင္းေပၚမွာ တင္ျပခဲ့ျပီးသားျဖစ္ပါတယ္. အခုမွဘာလို ့က်ေနာ္တင္ျပရသလဲဆိုရင္ ရွင္း ရွင္းေျပာရရင္ ေမးထားတဲ့မိတ္ေဆြ မ်ားရွိတဲ့အတြက္ေရာ၊ က်ေနာ့္ ဆိုဒ္ထဲမွာျပီးျပည့္စံုေစခ်င္တာေရာ ၊လာေရာက္ေလ့လာတဲ့ မိတ္ေဆြမ်ားအတြက္နည္းပညာတစ္ခုခု ပါသြားေစခ်င္လို ့ေရးသားလိုက္ ရျခင္းျဖစ္ပါတယ္။ ဒီပိုစ့္က အားလံုးအတြက္ အရွင္းလင္းဆံုး၊ နားလည္နိုင္ဆံုး ျဖစ္ေစရန္အတြက္ အေသးစိတ္တစ္ဆင့္ခ်င္းကို ရွင္းလင္းေဖၚျပေပးထားတာျဖစ္ပါတယ္။
ကဲစလိုက္ၾကရေအာင္ back up ဘာလို ့လုပ္ရသလဲဆိုရင္ မိမိတို ့ရဲ ့ဝင္းဒိုးျပႆနာေတြ ခဏခဏတက္ေနတဲ့အတြက္ အစကေနျပန္ျပန္ျပီး Windows မတင္ခ်င္တာရယ္၊ မိမိအခ်ိန္ ကုန္ခံျပီးထည့္သြင္းထားတဲ့ program ေတြကို Windows ေၾကာင့္၊ virus ေၾကာင့္၊ အျခားျပႆနာ တစ္ခုခုေၾကာင့္ မပ်က္ဆီး မဆံုးရံႈးခင္မွာ back up လုပ္ထားလိုက္ရင္ Windows ျပန္တင္စရာမလိုဘဲ အဲဒီ back up Image ဖိုင္ကို ျပန္ထည့္လိုက္တာနဲ႔ Windows လည္း တင္ၿပီးသား၊ Software ေတြလည္း တင္ၿပီးသား ျဖစ္သြားေအာင္ ျပဳလုပ္ျခင္းျဖစ္ပါတယ္။ အလြယ္ဆံုးနည္းေျပာရရင္ Windows Partition အပိုင္းတစ္ခုလံုးကို Image file အျဖစ္ copy ကူးယူလိုက္ျခင္းျဖစ္ပါတယ္. 
မွတ္ခ်က္။   ။ back up လုပ္တယ္ဆိုတာ ဝင္းဒိုးတင္ျပီး အေရးၾကီးလိုအပ္တဲ့ Program ေတြ၊ Driver ေတြ ထည့္ျပီးတဲ့ အခ်ိန္ မွာ လုပ္ထား သင့္ပါတယ္။ အခ်ိန္ကာလၾကာလာတာနဲ ့အမွ် ဝင္းဒိုးထဲမွာလဲ program ေတြမ်ားလာမွာျဖစ္တဲ့အတြက္ ဒီအခ်ိန္ၾကမွ back up လုပ္မယ္ဆိုရင္ အခ်ိန္ အရမ္းၾကာမွာျဖစ္ျပီ Restore ျပန္လုပ္မယ္ဆိုရင္ လဲအခ်ိန္ေတြၾကာေန အံုးမွာျဖစ္ပါတယ္။ ဒါေၾကာင့္ မိတ္ေဆြမ်ားအေနနဲ ့အေပၚမွာ က်ေနာ္ေျပာခဲ့သလို ဝင္းဒိုးတင္ျပီး လိုအပ္တာေတြ ျဖည့္စြပ္ျပီးတဲ့ အခ်ိန္မွာ back up လုပ္ေပးၾကပါ ဒါမွ Windows ျပန္တင္ရတဲ့ ဒုကၡ ၊ program ေတြ ၊ Driver ေတြ ထည့္သြင္း ရတဲ့ ဒုကၡ မွကင္းေဝးမွာျဖစ္ပါတယ္။ အားသာခ်က္အေနနဲ ့ေျပာရမယ္ဆိုရင္ ဝင္းဒိုးတစ္ခုလံုးကို back up မလုပ္ဘဲ မိမိအတြက္ အသံုးဝင္တဲ့  program ကိုဘဲ back up လုပ္နိုင္တာပါ။ မိမိတို ့ back up လုပ္တဲ့အခ်ိန္မ်ားမွာ Data ေတြကိုေရြးခ်ယ္ျပီး back up လုပ္ခြင့္ရွိတာကို ေရြးခ်ယ္ေပးခဲ့မယ္ဆိုရင္ မိမိ back up လုပ္ခ်င္တာကိုဘဲ လုပ္နိုင္မွာျဖစ္ပါတယ္။ restore ျပန္လုပ္မယ္ဆိုရင္လဲ မိမိအသံုးျပဳမယ့္ back up file ကိုဘဲ restore ျပဳလုပ္နိုင္ပါတယ္။
*********************************************
Back Up ျပဳလုပ္နည္း

အရင္ဆံုး Back up လုပ္တဲ့အပိုင္းကိုအရင္သြားပါမယ္... မိတ္ေဆြမ်ားအရွင္းလင္းဆံုးျဖစ္ေအာင္ က်ေနာ္ ပံုေလးေတြနဲ ့ေဖၚျပေပးပါမယ္။
( ပံု - ၁ )

( ပံု - ၁ ) အတိုင္း  Control Panel ထဲက Backup and Restore ကိုသြားပါ။

( ပံု - ၂ )
( ပံု - ၂ ) အတိုင္း Set up backup ကို Click ပါ။

( ပံု - ၃ )
( ပံု - ၃ ) အတိုင္း မိမိသိမ္းမယ့္ Partition  အပိုင္းတစ္ခုခုကိုေရြးခ်ယ္ေပးရမွာပါ.က်ေနာ္ကေတာ့ Partition D: ထဲမွာ သိမ္းျပီးေဖၚျပမွာျဖစ္ပါတယ္။ တကယ္လို ့မိမိက စက္ထဲ မွာမသိမ္းခ်င္လို ့အျခား ၾကိဳက္ႏွစ္သက္ရာ memory storage မွာသိမ္းနိုင္ပါတယ္။ အဲဒီအတြက္ အသံုးျပဳမည့္ memory storage ကိုမိမိစက္မွာတပ္ျပီး Refresh ကို click ေပးလိုက္ရင္ မိမိရဲ ့memory storage ကိုေဖၚျပေပး လာပါလိမ့္မယ္။ ျပီးရင္  Next ကို Click  ပါ။

( ပံု - ၄ )
( ပံု - ၄ ) အတိုင္း back up ျပဳလုပ္ရာမွာ မိမိၾကိဳက္ႏွစ္သက္ ရာကိုဘဲေရြးခ်ယ္နိုင္ဖို ့အတြက္ Let me choose ကိုေရြးေပးျပီး Next ကို Click  ပါ။

( ပံု - ၅ )
( ပံု - ၅ ) အတိုင္း မိမိ back up လုပ္မည့္ ဖိုင္ေတြကိုအတည္ျပဳျပီး  Next ကို Click  ပါ။

( ပံု - ၆ )
( ပံု - ၆ )  ကိုေရာက္လာရင္ Change schedule ကို click ျပီး ( ပံု - ၇ ) အတိုင္း မိမိတို ့ back up လုပ္ခ်င္တဲ့ အခ်ိန္ေတြ သက္မွတ္ေပးနိုင္ပါတယ္။

( ပံု - ၇ )

( ပံု - ၈ )
( ပံု - ၈ ) အတိုင္း  Save settings and run backup ကို Click ေပးလိုက္ပါ။

( ပံု - ၉ ) 
( ပံု - ၉) အတိုင္း back up လုပ္ေနတာကို ျပီးတဲ့အခ်ိန္ထိ ေစာင့္ေနေပးလိုက္ပါ။ျပီးသြားရင္ေတာ့ back up လုပ္တဲ့အပိုင္းျပီးပါျပီ။ မိမိသိမ္းထားတဲ့  memory storage မွာသြားၾကည့္လိုရင္ WindowsImageBackup ဆိုတဲ့ Folder ေလးေတြ ့ရပါလိမ့္မယ္.

အခုဆက္ျပီး Restore လုပ္တဲ့အပိုင္းကိုဆက္သြားၾကရေအာင္...

မိမိတို ့backup ျပဳလုပ္ထားတဲ့ image file ကို ဘယ္လို restore ျပဳလုပ္မလဲဆိုရင္ ေအာက္ကပံု ေလးေတြ အတိုင္း တစ္ဆင့္ခ်င္းသြားရမွာျဖစ္ပါတယ္. Control Panel > Back up and  Restore ကို Click ပါ။

( ပံု - ၁၀ )
( ပံု - ၁၀ ) အတိုင္း Recover system setting or your computer ကို Click ပါ။

( ပံု - ၁၁ )

( ပံု - ၁၁ ) အတိုင္း ျပီးေတာ့ Advance recovery method ကို Click ပါ။

( ပံု - ၁၂ )
( ပံု - ၁၂ ) အတိုင္း ေရာက္လာရင္ ( Choose Advance recovery method ) တြင္ မိမိသိမ္းထားခဲ့ တဲ့ Back up file မွတစ္ဆင့္ Restore လုပ္မွာျဖစ္တဲ့အတြက္ Use a system image you created earlier to recover your computer ကိုေရြးျပီး Click ေပးလိုက္ပါ။

( ပံု - ၁၂ ) 
( ပံု - ၁၂ ) အတိုင္း Restart ကို click ေပးလိုက္ပါ။
 ( ပံု - ၁၃ ) 
( ပံု - ၁၃ ) အတိုင္း  Next က္ို Click ပါ။

 ( ပံု - ၁၄ ) 
( ပံု - ၁၄ ) အတိုင္း back up လုပ္ထားတဲ့ image file တည္ေနရာကို  အလိုအေလ်ာက္ ေဖၚျပေပးပါလိမ့္မယ္။ Next က္ို ဆက္ျပီး Click ပါ။

 ( ပံု - ၁၅ ) 
( ပံု - ၁၅ ) အတိုင္း  Next က္ို Click ပါ။

 ( ပံု - ၁၆ ) 
( ပံု - ၁၆ ) အတိုင္း  Finish က္ို Click ပါ။

( ပံု - ၁၇ )
( ပံု - ၁၇ ) အတိုင္း မိမိကြန္ပ်ဴတာရဲ ့back up လုပ္ထားတဲ့ image file ကို restore ျပဳလုပ္ေနပါလိမ့္မယ္ သူ ့ကိုလဲေစာင့္ေနေပးလိုက္ပါ.အားလံုးျပီးသြားရင္ windows ျပန္တက္လာတဲ့အခ်ိန္မွာ မိမိ windows ဟာ backup မလုပ္ခင္အခ်ိန္က အတိုင္းျပန္လည္ရရွိမွာျဖစ္ပါတယ္။
ေက်းဇူးတင္ပါတယ္...              ေနမင္းေခာတ္

iCare Data Recovery

တစ္ေန႔သ၌ ကၽြႏု္ပ္ထံသုိ႔ အင္မတန္ရင္းႏွီးေသာ မိတ္ေဆြတစ္ဦး ေရာက္ရွိလုိ႔ လာေလ၏။ ေရာက္လွ်င္ ေရာက္ခ်င္း . . . .
ကုိေစတနာႀကီး ကူညီပါအံုး . . . ကၽြန္ေတာ္ရဲ႕ Recorder ေလးထဲက ဖုိင္ေတြကို ယူမရေတာ့လုိ႔ပါ . . . အေရးႀကီးတဲ့ အသံဖုိင္ေတြ အမ်ားႀကီးပါ . . . လုပ္ပါအံုး . . .
အင္း . . . ျဖစ္လုိက္ရင္ အသည္းအသန္ပါလား . . . ကုိယ့္လူ . . . 
ကၽြႏု္ပ္လည္း ၎၏ Recorder ကုိ Computer ႏွင့္ ခ်ိတ္ဆက္ၾကည့္ရာ Format ခ်ရန္ err ျပေလ၏။ သုိ႔ႏွင့္ ကၽြႏု္ပ္လည္း Format လုပ္လုိက္ေလ၏။ 
အာ . . . ကုိေစတနာႀကီး . . . ဘယ္လုိလုပ္လုိက္တာလဲ . . ကၽြန္ေတာ္ Data ေတြ ကုန္ေရာေပါ့ . . .
ဟဲ . .  ဟဲ . . 
ကၽြႏု္ပ္လည္း အားပါးတရ ရယ္ေမာမိၿပီး
ေနပါအံုး . . . ကုိယ္လူ႔ရယ္ . . . လာမွာေပါ့ 
ဟု ေျပာဆုိၿပီး ကၽြႏု္ပ္၏ စက္ထဲတြင္ ရွိေသာ ပုံႏွင့္ အျခားဖုိင္မ်ားစြာကို ေကာင္းစြာ ျပန္ယူႏုိင္ေသာ icare data recovery ေလးျဖင့္ ၎၏ အသံဖုိင္မ်ားကုိ ယူေပးလုိက္ေလေတာ့၏။ ထုိအခါမွ Data မ်ားကုိ ျမင္ေနရေသာ ကၽြႏု္ပ္၏ မိတ္ေဆြသည္လည္း  အေပ်ာ္ႀကီး ေပ်ာ္ကာ ေက်းဇူးအထူးပင္ တင္ရွိၿပီး ျပန္သြားေလေတာ့သည္။
ေမာင္ေစတနာ

Thursday, 22 November 2012

Destop ေပၚမွာေဆာ္ေလးေတြ တင္ရေအာင္

This summary is not available. Please click here to view the post.

Tuesday, 20 November 2012

Chess(စစ္တုဘုရင္) နဲ႕ ဖဲကစားခ်င္သူမ်ား ေတာ္ေတာ္ေလးေကာင္းတဲ့ဂိမ္းေလးပါ

ပံုထဲကအျဖဴေရာင္ေကာင္မေလးက သူအလွည့္ေရာက္ရင္ သူကိုယ္တိုင္လက္နဲ႕လာေရႊ႕တာပါ...
ကို႕အလွည့္ေရာက္ရင္ေတာ့ စဥ္းစားလို႕မရေအာင္ ဖင္ကံုးျပလိုက္ ႏို႕ေတြပြတ္ျပလိုက္နဲ႕ စဥ္းစားလို႕မရေအာင္ အမ်ိဳးမ်ိဳးျမွဴဆြယ္ေနပါလိမ့္မယ္..Right Click နဲ႕ေရႊ႕ရမွာပါ..
ေတာ္ေတာ္ေကာင္းတဲ့ဂိမ္းလို႕ဆိုလို႕ရပါတယ္...
ဂိမ္းက Online ဂိမ္းမဟုတ္လို႕ ေဒါင္းလုပ္ဆြဲၿပီးမွ ကစားလို႕ရမွာပါ..
ကစားၾကည့္ခ်င္တဲ့ဂစ္စမာန္ေဘာ္ေဘာ္ေဒ ေအာက္ကလင့္ေလးကို ႏွိပ္လိုက္ပါ....
http://www.uplay-istrip.com/JeuxV4/setupDemoSexyChess.exe
ဂိမ္းက 134.79MB  ရွိပါတယ္.. Internet Download Mananger နဲ႕ေဒါင္းမွအဆင္ေျပမွာပါ...
Internet Download Mananger မရွိေသးတဲ့ ဂစ္စမာန္ေဘာ္ေဘာ္ေဒက ေအာက္ကလင့္မွာယူႏိုင္ပါတယ္
http://www.mediafire.com/?fugogu61hb6mdq5  ေဒါင္းလုပ္ဆြဲၿပီးလို႕ run ၿပီးလို႕ကစားခ်င္ရင္
အျဖဴေရာင္ေကာင္မေလးနဲ႕စၿပီးကစားရမွာပါ ...
မွတ္ခ်က္။  ။ Uplay ဂိမ္းတစ္ခုခုအရင္တင္ထားၿပီးလို႕ ေနာက္ထပ္ထပ္တင္ရင္ အဲဒီ Uplay ေပၚမွာပဲ
ႏွိပ္ၿပီးကစားရမွာပါ...


ကဲစစ္တုဘုရင္မွာ အလဲထိုးမဲ့ေကာင္မေလးေတာ့ ဆိုဖာေလးေပၚမွာ ပလက္ကေလးလွန္ၿပီးေစာင့္ေနၿပီးဗ်ိဳ႕           ေနာက္ထပ္ strip , sudoku ,belote နဲ႕ poker (ရွိဴးဖဲ) ဆက္ကစားခ်င္ေသးးတယ္ဆိုရင္ေတာ့  ေအာက္ကလင့္မွာ ေဒါင္းပီး run လိုက္ပါ...                           http://www.uplay-istrip.com/demo/

Sunday, 28 October 2012

SuperAntiSpyWare v.5.0.1148 pro FullVersion

 SuperAntiSpyWare v.5.0.1148 pro FullVersion တင္ေပးလိုက္ပါၿပီ။ ေအာက္က အဆင္ေျပတဲ့ Link မွာ Download ယူႏိုင္ပါၿပီခင္ဗ်ာ။
Download ===> Mediafire Link ( mmitd) Mediafire4Shared ၊  ifile
4shared အေကာင့္မရွိသူမ်ားအတြက္ Username : mailserver.npt@gmail.
com Passwords: 12213456

"SHIFT + DELETE" နဲ႔ မွားဖ်က္မိတဲ့ Files ေတြ Recovery လုပ္ယူနည္း


"SHIFT + DELETE" နဲ႔ မွားဖ်က္မိတဲ့ Documents, Photos, Video, Music ,Email   ေတြကို ျပန္ယူႏိုင္ေပးႏိုင္ပါတဲ့အျပင္ Recycle Bin,Hard Drives, USB Thumb Drives, Camera Media Cards, Floppy Disks စ,တဲ႔ Storage Devices ေတြက မွားဖ်က္မိတာေတြကိုလည္း Recovery လုပ္ေပးႏိုင္ပါတယ္ ..။
 အသံုးျပဳပံုကလည္း အရမ္းလြယ္ပါတယ္ မိမိ Recovery လုပ္ခ်င္တဲ႔  Device ကိုေရြးပါ Start Scan ကို ႏွိပ္ပါ ... Recover လုပ္မဲ႔ Files ကို Select မွတ္ပါ .. Recover File ကိုသိမ္းထားမဲ႔ Folder ကိုေရြးေပးပါ...  ျပီးရင္ Recover File ကို ႏွိပ္ေပးလိုက္ရံုပါပဲ ...။
A quick and effective way to restore deleted or lost files.
It can also recover files that have been emptied from the Recycle Bin, permanently deleted files within Windows using the Shift + Delete, and files that have been deleted from within a Command Prompt.
  1.     Easily recover documents, photos, video, music and email.
  2.     Quickly recover files - even those emptied from the Recycle Bin.
  3.     Recover files after a hard drive partitioning error.
  4.     File recovery after accidental format - even if you have reinstalled Windows.
  5.     Recover files from Hard Drives, USB Thumb Drives, Camera Media Cards, Floppy Disks and other storage devices.


Avira Antivirus Offline Update လုပ္နည္း

အင္တာနက္ကြန္ရွင္းနဲ႔ ေ၀းေနသူမ်ားအေနျဖင့္ Avira Anti Virus Software သံုးစြဲသူမ်ား Offline update လုပ္လို႔ အဆင္မေျပသူေတြအတြက္ ဒီပို႔စ္က အကူအညီေပးႏိုင္ပါလိမ့္မယ္။အသံုးလည္း အေတာ္ေလး တည့္တယ္။က်ေနာ္ အခုေပးမယ့္ ေအာက္ကေဒါင္းလုဒ္လင့္ကို ေဒါင္းလုဒ္ျပီးလွ်င္ RAR ဖိုင္ကိုေျဖလိုက္ပါ။ ၎ဖိုလ္ဒါတြင္ ဖိုင္ (၂)မ်ိဳးေတြ႕ပါလိမ့္မယ္။
 (၁)avira_antivir personal en 
(၂) vdf-fusbundle ဇစ္ဖိုင္နဲ႔ ႏွစ္မ်ိဳးေတြ႕ရမွာပါ။

ဒီဗိုင္းရပ္စ္ေဆာ့၀ဲကို မိမိစက္ထဲထည့္သြင္းခ်င္ရင္ ၎ avira_antivir personal en ကို အင္စေတာေမာင္း လိုက္ပါ။ အင္စေတာထည့္သြင္းနည္းကိုေတာ့ က်ေနာ္မေျပာေတာ့ဘူး။ လုပ္တတ္မယ္လို႔ေမွ်ာ္လင့္ပါတယ္။ ၎ေဆာ့၀ဲကို အင္စေတာထည့္သြင္းျပီးလွ်င္...

Offline Update လုပ္နည္း... 

၁။ ၎ပရိုဂရမ္ကိုဖြင့္လိုက္ပါ။
 ၂။ ဖြင့္ျပီးလွ်င္ ေအာက္ပါပံုအတိုင္း Menu က Update ကိုႏွိပ္။ ျပီးေတာ့ Manualupdate ကိုဆက္ႏွိပ္ပါ။
၃။ ေနာက္ေဘာက္စ္တစ္ခုေပၚလာရင္ (၂) vdf-fusbundle ဇစ္ဖိုင္ကိုေရြးျပီး Open ႏွိပ္။ ျပီးလွ်င္ ခဏေစာင့္ပါ။ တစ္မိနစ္ ႏွစ္မိနစ္ေလာက္ၾကာရင္ (update) လုပ္တာျပီးသြားလွ်င္ OK

 ေဒါင္းလုဒ္... update Offline "Avira Antivirus"

ကဲ...ဒါပါပဲ။ အဆင္ေျပပါေစ...
 ေစာလင္းနက္စ္

Thursday, 20 September 2012

Window မွာ Hard Disk ကို Partiyion ခြဲနည္း/ ေပါင္းနည္း

Window 7 မွာ Hard Disk ကို Partition ခြဲနည္း / ျပန္ေပါင္းနည္း


မဂၤလာပါ ... သူငယ္ခ်င္းတစ္ေယာက္ေမးထားတာေလးကို မသိေသးသူအားလံုးအတြက္ မွ်ေဝလိုက္ပါတယ္... သူေမးထားတာကေတာ့ Window 7 မွာ Partition ကို ဘယ္လို ခြဲရမလဲ ..? ျပီးေတာ့ ဘယ္လိုျပန္ေပါင္းရမလဲ ..? ဆိုျပီးေမးထားေလးပါ....
ဘယ္ Software မွ သံုးစရာမလိုပါဘူး Window ေပၚမွာပဲ ခြဲ/ေပါင္း လို႔ရပါတယ္......။
Partition ခြဲနည္း
Start >> Computer ကို Right Click နဲ႔ Manage ကို ႏွိပ္ပါ (သို႔) Run > diskmgmt.msc  ကို ေရးထည့္ျပီး Enter ေခါက္လည္းရပါတယ္...။

က်န္တာေတြကို ပံုေလးေတြအတိုင္း ဆက္လုပ္ေပးသြားပါ..။

Drive (C:) ကေနဥပမာ အျဖစ္ ခြဲျပပါ့မယ္... အေပၚကပံုမွာျပထားတဲ႔အတိုင္း (C:) ေပၚကို Right Click ႏွိပ္ျပီး Shrink Volume ကိုေရြးပါ..။
ခဏေစာင့္ေပးပါ..။
ဒီေနရာမွာ မိမိ လိုခ်င္သေလာက္ ခြဲပါမယ္... 1GB ကို 1024 MB ရွိပါတယ္ ..(မိမိ လိုသေလာက္ တြက္ခ်က္ျပီး ေရးထည့္ေပးလိုက္ပါ)  က်ေနာ္ကေတာ့ 30GB ခြဲမွာမို႔ 30720 လို႔ေရးထည့္ေပးလိုက္ပါတယ္...။ ျပီးရင္ Shrink  ကိုဆက္ႏွိပ္လိုက္ပါ..။
ခုဆိုရင္ နာမည္မေပးရေသးတဲ႔ Partition ေလးတစ္ခုေရာက္လာပါျပီ... မျပီးေသးပါဘူး သူ႕ကို နာမည္ေပး ကင္ပြန္းတပ္ဖို႔ က်န္ပါေသးတယ္ ... နာမည္ေပးဖို႔  Right Click  ေထာက္ျပီး   New Simple Voulem  ကိုေရြးေပးပါ..။
Next အဆင့္ဆင့္ ႏွိပ္ေပးျပီး ...

နာမည္တစ္ခုေရြးေပးလိုက္ပါ .. က်ေနာ္ကေတာ့ G ကိုေရြးေပးလိုက္ပါတယ္...။
Next အဆင့္ဆင့္ ႏွိပ္ေပးျပီး Finsh ကိုႏွိပ္ပါ..။
 My Computer ကိုဖြင့္ၾကည့္လိုက္ပါ ေမာင္ G ေလးအျဖစ္နဲ႔ Patition ေလးတစ္ခု ေရာက္လာပါျပီ...။
Partition ခြဲနည္းကေတာ့ အဲ့ဒါပါပဲ ....။

Partiton ျပန္ေပါင္းနည္း
မလိုခ်င္ေတာ့လို႔ ျပန္ေပါင္းခ်င္ရင္ေတာ့... ေမာင္ G ကို အရင္ဆံုး သတ္ပစ္ရပါလိမ့္မယ္ :D  
Delete လုပ္ေပးရပါ့မယ္..။
ေမာင္ G ေပၚကို Right Click  နဲ႔  Delete Volume ကိုေရြးပါ..

Yes ကိုႏွိပ္ပါ...
ျပန္ေပါင္းဖို႔ အတြက္ (C)  ေပၚကို Right Click ႏွိပ္ျပီး Extend Volume ကိုေရြးပါ ....
Next အဆင့္ဆင့္နဲ႔ OK လိုက္ပါ..။
ခုဆိုရင္ ေမာင္ G ေလးမရွိေတာ့ပဲ (C) ထဲကို ျပန္ေရာက္သြားပါျပီ....။

 အားလံုး နားလည္လြယ္ေအာင္မို႔ အခ်ိန္ေပးျပီး ပံုေလးေတြနဲ႔ တင္ေပးလိုက္တာပါ ..
အားလံုး အဆင္ေျပၾကပါေစ...
ဝင္းကမာၻေက်ာ္ (နည္းပညာမွတ္တမ္း)

TuneUp Utilities 2013 13.0.2013.194 Final

TuneUp Utilities ကို အားလံုးသိၾကမွာပါ ကြန္ျပဴတာ ေလးတယ္ေႏွးတယ္ဆိုတဲ႔ သူငယ္ခ်င္းအတြက္ ေနာက္ဆံုး Version 2013 ကို တင္ေပးလိုက္ပါတယ္..။
TuneUp Utilities 2013 can quickly make your Windows operating system faster, easier to use, and more secure. And all operations performed on the operating system are completely safe, because all changes are monitored by TuneUp Rescue Center and can be undone at any time. All TuneUp Utilities modules can be accessed through a common interface that is divided into six categories. In addition, the main window also has three general buttons in a dark gray bar to the right at the top of the window. Pressing the first button starts the TuneUp Rescue Center module. The second button starts the TuneUp Update Wizard, which can be used to update TuneUp Utilities 2009 to the latest version over the Internet. The last button provides help and settings that you can use to customize the software package to meet your needs. 
                                              source..http://winkabarkyaw.blogspot.com/

Wednesday, 4 July 2012

windows 7 audio ျပႆနာ ေျဖရွင္းနည္း


ဒီနည္းလမ္းေလးကေတာ့ windows 7 ရဲ ့အသံျပႆနာ အေျဖရွာနည္းေတြထဲက တစ္နည္းဘဲျဖစ္ပါတယ္။
1.start / search / gpedit.msc / enter.
2.computer configuration / administrative templates / system / device installation / device installation restrictions / အေပၚဆံုးက allow administrators to override device installation restriction policies ကို Enabled / apply / OK.
3.ျပီးရင္ ေအာက္ဆံုးမွာ prvent installation of devices not described by other policy setings ကို Enabled / apply / OK .
4.အထက္ပါအဆင့္ေတြျပီးရင္ ၎ ေဘာက္ကိုပိတ္လိုက္ပါ။

ဆက္သြားပါအံုးမယ္...

5. Computer / Right Click / Manage .
6. Computer Management ေဘာက္က်လာရင္ / Device Manager ကို double click / ညာဘက္မွာ Sound , video and game controllers ေအာက္မွာရွိေနတဲ့ High Definition Audio Device ေပၚမွာ Right Click / Uninstall / OK.
7. Computer Management ေဘာက္ ရဲ ့ေနာက္ဆံုး icon ပံု ( scan for hardware changes ) ကို Click လိုက္ပါ။
8. Other devices ကိုရွာပါ. သူ ့ေအာက္က Audio Device on High Definition Audio Bus ေပၚမွာ Right Click / Update Driver Software ကို Click ေပး / Search automatically for updated driver software ကို Click ျပီးခဏေစာင့္ေနေပးပါ။
 9. installing driver software လုပ္ျပီးရင္ေတာ့ မိမိတို ့ၾကံဳ ေတြ ့ေနရတဲ့ windaws 7 audio ျပႆနာ ေျဖရွင္းျပီးသြားတာကို ေတြ ့ရပါလိမ့္မယ္.
 
ေနမင္းေခတ္

Share

Twitter Delicious Facebook Digg Stumbleupon Favorites More